

Spot humidor leaks fast with a 10 minute checklist and a 7 day hygrometer stability log. Learn the 1 to 3% per day thresholds and simple fixes.
Run three checks tonight: the dollar-bill test, the whoosh/drop test, and a flashlight sweep along every seam. If the bill slides out with no drag, if the lid drops with a dull thud instead of a soft hiss, or if light leaks through the seams, your humidor has a seal problem that a hygrometer log will confirm within a week.
TL;DR:
- The 10-minute physical checks may miss slow leaks detectable only through a week-long humidity log that reveals drift and recovery patterns.
- A properly calibrated hygrometer and seasoned humidor are crucial; unseasoned cedar can cause false positives and skew test results.
- Common failure points include loose hinges, warped lids, cracked cedar, and glass-to-frame seal issues, which often require simple repairs or gasket replacements.
- Large or multi-door humidors tend to develop multiple leak points, making active monitoring and high-quality sealed units a better long-term solution.
- Performing tests at seasonal transitions and staggering checks across multiple humidors helps prevent undetected slow leaks and maintains optimal humidity.
Table of Contents
- What Is a Humidor Leak Test and Why Does It Matter?
- Your 10-Minute Leak Test Checklist
- How to Test a Humidor for Leaks Step by Step
- What Your Test Results Actually Mean
- Fixing a Leaky Seal: From Quick Repairs to Replacement
- What Years of Building Humidors Teaches You About Seals
- When to Test, and What I’ve Learned Managing Multiple Boxes
- Solving Seal Problems for Good
- Where to Verify the Numbers in This Guide
- Sources
- FAQ
What Is a Humidor Leak Test and Why Does It Matter?
A humidor leak test is a set of physical and instrument checks that confirm whether the cabinet’s seal is holding humidity where you set it, rather than bleeding it out through the lid seam, hinges, or glass frame. Most collectors know the dollar-bill trick. Fewer know that a single reading, even a good one, tells you almost nothing about whether the seal will hold up over a humid August or a dry February.
That’s the gap this guide closes. The industry standard isn’t a snapshot. It’s a stability test, a logged record of humidity behavior over several days that reveals drift, recovery speed, and the difference between a box that’s merely fine right now and one that’s actually sealed. Think of your humidor as an instrument, not a box. Instruments get calibrated and monitored. Boxes just sit there until the cigars inside tell you, too late, that something went wrong.
Before any test means anything, the humidor needs to be seasoned. An unseasoned Spanish cedar interior absorbs and releases moisture erratically for days or weeks after it’s new, which means a fresh humidor can fail a leak test simply because the wood itself hasn’t settled. Season first, calibrate your hygrometer second, test third. Skip that order and you’ll chase phantom leaks that don’t exist.
Your 10-Minute Leak Test Checklist
Run these four checks in order. Each one takes two minutes or less, and together they’ll tell you whether you need a deeper hygrometer air tightness test or just a hinge adjustment.
- Dollar bill test. Close the lid on a dollar bill so it sits halfway in, halfway out, at the front center of the seam. Pull it out slowly. You want firm, even resistance the whole way. If it slides free with no drag, the seal at that point isn’t compressing.
- Whoosh/drop test. Open the lid fully, then let it fall shut under its own weight (hand hovering nearby for heavier lids). A properly sealed box exhales a soft “whoosh” as it closes, air being pushed out through a tight gap. A hollow, airy clunk with no resistance means the seal isn’t compressing evenly.
- Flashlight test. Darken the room, place a bright flashlight inside facing outward, and close the lid. Circle the entire perimeter, including hinges and the front clasp. Any visible light pinpoints exactly where the gap is. Glass-top boxes need a second pass around the glass-to-frame seam, since that joint fails independently of the lid-to-base seal.
- Quick hygrometer sanity check. Confirm your hygrometer is calibrated (more on that below), place it centrally, close the lid, and check readings at the same time over 24 to 72 hours. Stable numbers within a percentage point or two suggest a decent seal; a steady slide downward points to a leak worth investigating further.
None of these four replace each other. The dollar bill and whoosh tests catch obvious gaps. The flashlight catches what your fingers miss. The hygrometer catches the slow leaks that no physical test will ever reveal.
How to Test a Humidor for Leaks Step by Step
Before you touch a single test, season the box and calibrate the hygrometer. Skipping seasoning is one of the most common causes of a false positive, since unseasoned cedar swings humidity on its own and has nothing to do with the seal.
Calibrate first, always
Digital hygrometers drift over months of use, and even a brand new unit can read a percentage point or two off out of the box. The salt test remains the most reliable at-home method: pour a tablespoon of table salt into a bottle cap, add a few drops of water to dampen it without pooling, and seal both the cap and your hygrometer together inside a sandwich bag overnight. A correctly calibrated hygrometer will settle at 75% RH, since damp salt creates a stable reference humidity in an enclosed space. If yours reads differently, note the offset and adjust your future readings accordingly, or use the device’s built-in calibration function if it has one. Manufacturer manuals typically include specific calibration steps and placement guidance that reduce the margin of error further, and following the exact procedure for your unit beats a generic version every time.
The dollar-bill test, done properly
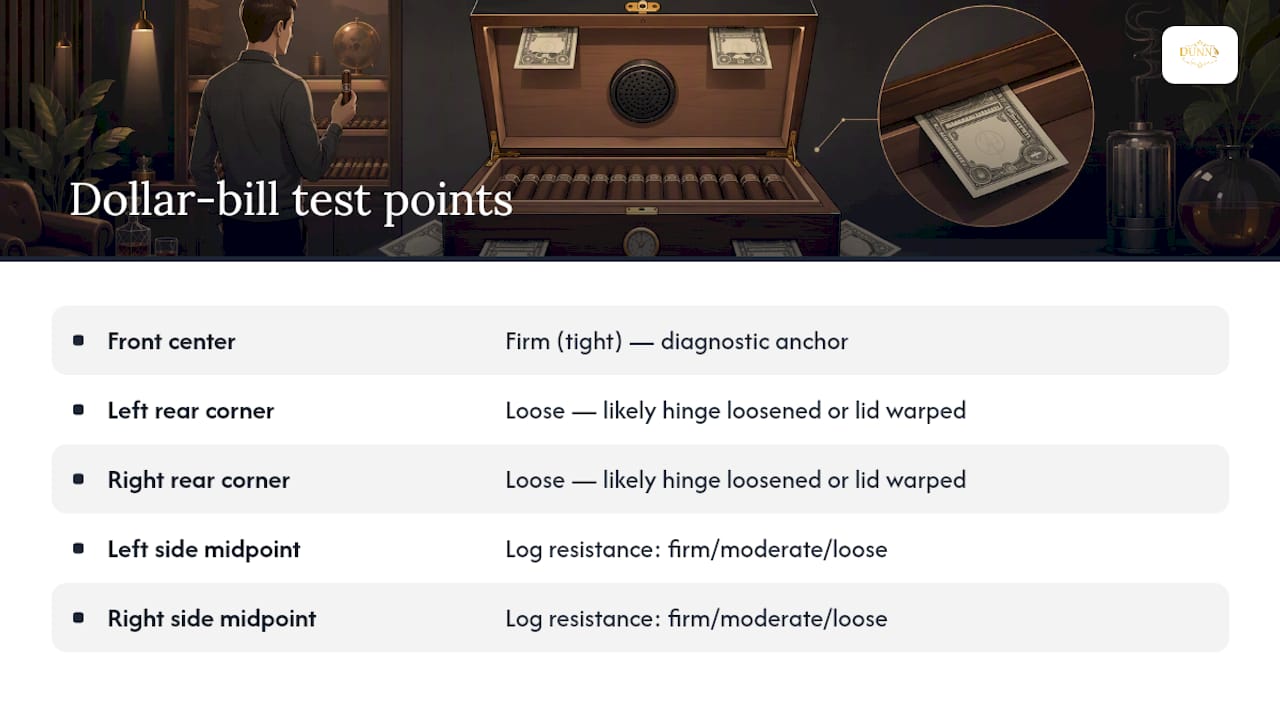
One bill at the front center tells you one thing about one spot. Real diagnostic value comes from testing at four or five points around the entire seam: front center, both back corners, and each side at the midpoint. Close the lid on the bill at each location, pull gently, and log the resistance as firm, moderate, or loose. A humidor that’s tight at the front but loose at both rear corners is telling you something specific: the hinges have likely loosened or the lid has warped slightly at the back, a common failure point on older or heavily used boxes. Write the results down. A pattern across five points is worth infinitely more than a single anecdote from the front seam.
Whoosh/drop nuances for heavy lids and glass tops
Heavier lids, especially on large cabinet-style humidors, need a gentler version of this test. Lower the lid slowly from about six inches above the seam rather than dropping it from full extension, and listen for the same soft exhale of air. On glass-top boxes, the whoosh test only evaluates the lid-to-base seam. The glass-to-frame seam is a separate seal entirely, and it fails independently, often around the corners of the frame where adhesive or gasket material thins out over years of temperature cycling.
Flashlight testing around glass frames
Run the standard flashlight sweep, then repeat it specifically along the glass perimeter with the flashlight angled from multiple directions. A hairline gap that doesn’t show light straight on can appear at a 30 degree angle. This extra pass takes thirty seconds and catches the single most commonly missed leak point on premium glass-top humidors.
The 7-day hygrometer log
This is where a real humidor air tightness test earns its name. Place your hygrometer centrally in the humidor (not against a wall or directly under the lid, where readings skew), close it, and record the humidity twice daily, morning and evening, at consistent times for seven days. Note every time you open the lid and roughly how long it stayed open. A logged stability test over a week or more reveals drift patterns that a single reading simply cannot show, including how fast humidity recovers after you access your cigars and whether the box drifts downward even when left untouched. Our guide to logging humidity data walks through building a simple tracking sheet if you want to formalize the process rather than jotting numbers on a notepad.
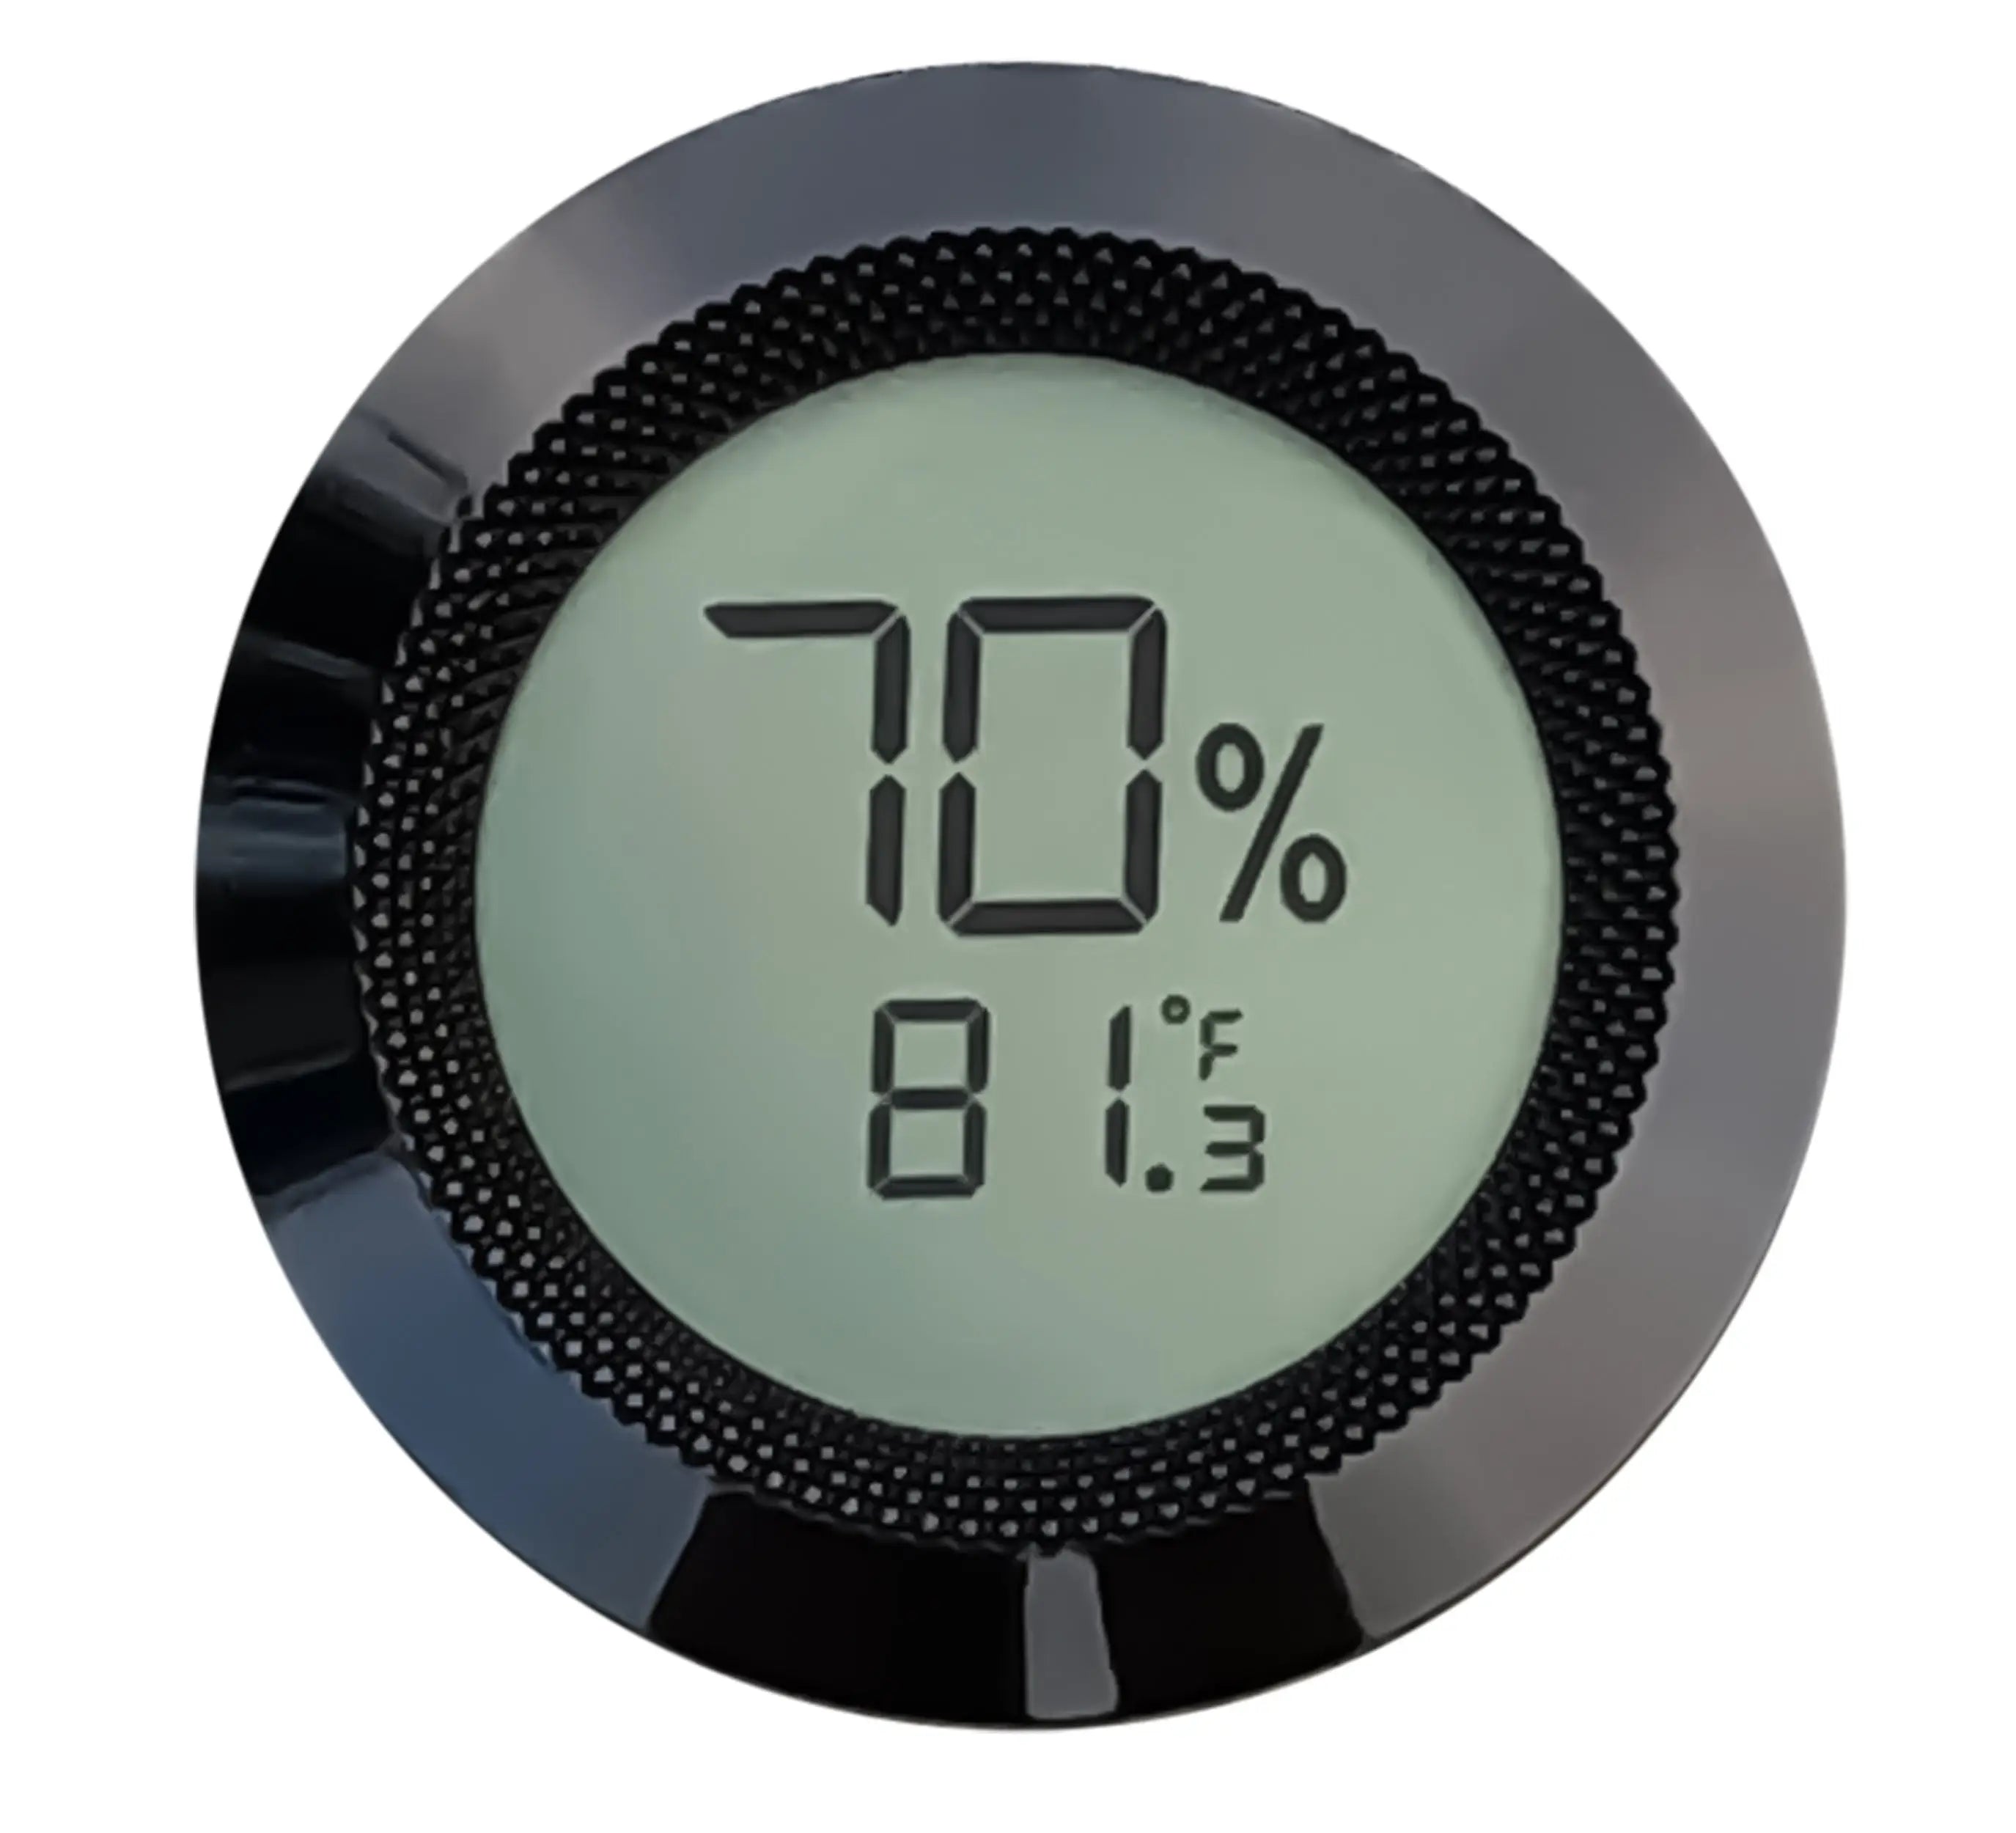
Digital hygrometers with memory functions save you the twice-daily manual check, but a basic analog unit paired with a phone reminder works nearly as well for a one-time diagnostic log. What matters is consistency in placement and timing, not the price of the device.
What Your Test Results Actually Mean
Numbers only matter against a benchmark. Closed-lid drift, humidity change with no opening at all, should stay at 1 to 3% per day at most. Build in a margin for hygrometer error too. Even a well-calibrated digital unit can be off by a point or two, so don’t chase a leak based on a single half-percent discrepancy.
By the numbers: what a 7-day log should show you
- Post-opening drop: under 4 to 5% RH
- Recovery window: back to baseline within about 3 hours
- Daily closed-lid drift: 1 to 3% RH maximum
- Acceptable hygrometer measurement error: 1 to 2% RH
Different failure patterns leave different fingerprints in your data and your physical tests:
- Immediate, sharp drop after closing that doesn’t recover: points to a lid seam leak, usually caught by the dollar-bill or whoosh test at a specific perimeter point.
- Slow, steady drift over days with no single obvious gap: suggests joinery failure or cracked cedar lining somewhere the flashlight can’t easily reach.
- One corner consistently loose on the dollar-bill test: a warped corner, often from years of temperature swings or a humidor stored near a window or vent.
- Faint light glow specifically around glass edges: a glass-to-frame seal failure, distinct from the main lid seal and requiring its own fix.
If your physical tests and hygrometer log disagree, meaning the dollar bill feels tight everywhere but your log shows steady drift, re-season the box for another week and re-run the log before assuming instrument error. Sometimes the wood itself is still equalizing, and a second test settles the question.
Fixing a Leaky Seal: From Quick Repairs to Replacement
Start with the cheapest, fastest fix and work upward. Most leaks resolve at step one or two.
- Tighten the hinges. Loose screws are the single most common cause of an uneven seal, and a screwdriver fixes it in under five minutes.
- Realign the lid. If one corner sits proud of the base, check for a slightly bent hinge plate or a warped lid edge and adjust or shim accordingly.
- Re-seat the glass insert. On glass-top models, remove and reset the pane if the surrounding gasket has shifted, which happens more often than owners expect after shipping or a move.
- Replace the gasket or weatherstripping, if your model uses one, once it’s visibly compressed or cracked.
- Apply food-safe silicone to hairline gaps along a glass seam, a straightforward and widely used fix for glass-frame leaks specifically.
- Use beeswax on hairline cedar fissures. Warm, pliable beeswax pressed into a small crack in the lining seals it without introducing chemicals near your cigars.
- Sand and re-line minor warps only if you’re comfortable with woodworking, since this is the point where an amateur fix can make things worse.
- Call a woodworker or consider replacement once you’re dealing with structural joinery failure or multiple simultaneous leak points, which usually signals the box has reached the end of its useful life.
Pro Tip: Keep a small tube of clear, 100% silicone sealant (the aquarium-safe kind, not construction-grade) in your humidor kit. It’s the fastest fix for a glass-seam leak and cures without leaving an odor that could taint your cigars.
Build a maintenance rhythm around the seasons rather than waiting for a problem. Check seals at each seasonal transition, when your home’s heating or cooling cycle changes most dramatically, and re-calibrate your hygrometer once a year even if it seems accurate. If you’re already noticing recurring issues, our detailed troubleshooting guide for humidors that won’t hold humidity walks through five specific checks beyond the basics covered here, and our general care guides cover the maintenance cadence in more depth.
What Years of Building Humidors Teaches You About Seals
We build walk-in humidors and electronic cabinets for collectors who measure their holdings in the hundreds or thousands of cigars, and the lesson repeats across every scale: the seal is the entire product. A gorgeous Spanish cedar interior means nothing if the lid doesn’t hold. That’s why cabinet-level and walk-in builds lean so heavily on engineered gaskets and multi-point latching rather than a single friction seal, the same principle the dollar-bill test is checking for on a desktop scale.
The three failure modes we see most often map directly onto the tests above:
- Monitoring gaps, where owners have no log and discover a slow leak only after cigars have already dried out.
- Cabinet-level instability, where large-format boxes need active humidity control rather than passive beads, since the internal air volume is too large for passive systems to stabilize alone.
- Seal fatigue on double-door units, where two seams instead of one doubles the points that need checking during any test.
A reliable digital hygrometer paired with a consistent logging habit catches all three long before they become a collection-wide problem.
When to Test, and What I’ve Learned Managing Multiple Boxes
Run the full 7-day stability log twice a year, at the start of heating season and again when it ends, since those are the moments your home’s ambient humidity swings hardest against your humidor’s seal. A quick triage, the dollar bill, whoosh, and flashlight trio, deserves a spot in your monthly routine instead, especially if you’re opening the box daily.
If you manage more than one humidor, or travel enough that boxes sit closed for weeks, stagger your checks so you’re never relying on memory for which unit needs attention. I keep a simple recurring reminder tied to each box rather than trusting myself to remember dates.
The single habit that preserves cigar quality longer than anything else isn’t a fancier humidor. It’s catching a slow leak in week one of a log instead of month three of dried-out wrappers.
— Belle Dunn
Solving Seal Problems for Good
Patch repairs buy time, but a box with warped joinery or a seal that keeps failing after every fix is telling you it’s reached its limit. An alternative is to consider cabinets and custom installations engineered around airtight, monitored humidity control from day one, reducing the need for frequent leak tests.

For collectors ready to stop chasing leaks, the Humidor Supreme 9200 Series Double-Door Electronic Humidor offers cabinet-level, dual-seal stability with active climate control. If your current box just needs better monitoring rather than replacement, the 300 Series Digital Hygrometer provides the logging accuracy referenced in this guide. And for a single-door electronic option that scales to a serious collection without the footprint of a double-door unit, the Humidor Supreme Electronic Humidor, 9000 Series fits collectors desiring integrated control without a full walk-in unit. If your seal problems point to structural failure rather than a fixable gap, request a consultation on a custom or walk-in build to get a solution engineered for your collection’s actual size.
Where to Verify the Numbers in This Guide
The recovery thresholds and stability-testing method cited throughout come from MOZSLY’s humidor seal and humidity guide. For step-by-step repair guidance, Holt’s cigar clubhouse covers the dollar-bill, whoosh, and silicone-repair methods in more detail. Northwoods Humidors’ guide to checking humidor seals explains common causes like warped lids and poor joinery, and any digital hygrometer’s user manual will walk through device-specific calibration.
Sources
- Humidor Seal Test & Humidity Guide – MOZSLY
- How to Fix a Leaky Humidor
- How to Check If a Humidor Is Sealed Properly – Northwoods Humidors
- MOZSLY user manual (hygrometer)
FAQ
Is 75% Humidity Too High for a Humidor?
Yes, for most cigars, 75% RH sits at the upper edge of acceptable and raises real risk of mold growth if sustained for more than a day or two.
What Are the Most Common Problems With Humidors?
Loose hinges, warped lids, cracked cedar lining, and poor original joinery cause the majority of seal failures, and unseasoned wood is the top cause of false alarms during testing. Most of these are fixable with the tightening, silicone, and beeswax repairs covered above rather than requiring full replacement.
What Should My Humidor Hygrometer Read?
If your calibrated hygrometer consistently reads outside that band with no opening to explain it, that’s your signal to start a leak test.
How Long Should a Humidor Leak Test Take?
The quick triage, dollar bill, whoosh, and flashlight, takes under 10 minutes total. A full diagnostic stability log needs 7 days of twice-daily readings to reveal drift and recovery patterns with confidence.
Can I Test a Humidor Leak Without a Hygrometer?
The dollar-bill, whoosh, and flashlight tests work without any instrument and catch most obvious gaps. A hygrometer log is still the only reliable way to catch slow leaks that don’t show up in a physical inspection.
Should I Season a New Humidor Before Testing for Leaks?
Yes, always season a new humidor for several days to a couple of weeks before running any leak test, since unseasoned Spanish cedar absorbs and releases moisture unpredictably. Testing an unseasoned box risks a false positive that has nothing to do with the actual seal.
How Often Should I Repeat a Humidor Leak Test?
Run the quick physical checks monthly and a full 7-day hygrometer log twice a year, timed around seasonal heating and cooling transitions. Collectors managing multiple humidors or frequent travel should stagger these checks so no single box goes unmonitored for long stretches.
Recommended
You May Also Enjoy
Cigar Locker Dimensions: Sizing Guide for Collectors and Lounges
Cigar locker dimensions explained: compartment sizes, cabinet footprints, capacity math and clearances, so you size a locker bank...
Read Article
Sealing a Walk-In Humidor: Envelope, Door and Penetrations
How to seal a walk-in humidor properly: vapor barrier placement, door gasket, penetrations and the controlled airflow a...
Read Article
Retail Humidor ROI: How to Measure What a Display Earns
What does a retail or lounge humidor really return? A practical framework for cigar shops, lounges and clubs:...
Read Article