

A materials-first guide for collectors: the six non-negotiable walk in humidor materials and envelope choices—vapor barrier, insulation, door, humidifier,...
A reliable walk-in humidor rests on six non-negotiable materials: solid Spanish cedar lining, closed-cell rigid foam insulation, a continuous heavy-duty vapor barrier, an insulated exterior-grade door with full weatherstripping, a properly sized commercial humidifier, and slatted cedar shelving that keeps air moving. Get the vapor barrier and thermal break wrong, and no amount of cedar will save your cigars. Before you spec anything, check your wall type and cubic footage. Those two numbers size the insulation and the humidifier.
TL;DR:
- Proper vapor barrier installation with sealed seams and penetrations is crucial; a gap or improper sealing can cause mold and humidity issues regardless of cedar quality.
- Insulation must be made of rigid closed-cell foam, not fiberglass batt, especially in basement or concrete-walled rooms, to maintain stable humidity and prevent moisture wicking.
- An insulated exterior-grade steel door with silicone weatherstripping and an adjustable threshold provides the best seal, significantly reducing humidity leaks and temperature fluctuations.
- Cedar boards should be acclimated on-site with moisture content below 12 percent before installation to prevent swelling and future sealing problems.
- Sizing the humidifier based on room volume plus leakage allowance prevents slow recovery and maintains consistent humidity levels essential for preserving cigars.
Table of Contents
- Why Spanish Cedar Is the Backbone of Walk-In Humidor Materials
- Which Insulation and Vapor Barrier Keep Humidity Stable?
- What Door and Seal Setup Actually Holds Humidity?
- Which Flooring and Lighting Materials Belong in a Walk-In Humidor?
- How Do You Size and Place a Humidifier for a Walk-In Room?
- How Should You Lay Out Cedar Shelving Inside a Walk-In Humidor?
- What Are the Biggest Build Mistakes and How Do You Season Cedar Correctly?
- What Does a Walk-In Humidor Build Actually Cost?
- Does Material Choice Affect Long-Term Mold Risk?
- When Should a Collector Commission a Custom Build Instead of DIY?
- Get a Walk-In Humidor Built on the Right Materials
- Sources
- FAQ
Why Spanish Cedar Is the Backbone of Walk-In Humidor Materials
Spanish cedar isn’t a nostalgic choice. It’s a functional one. The wood’s cellular structure absorbs and releases moisture in step with ambient humidity, acting as a buffer that smooths out small swings before they reach your cigars. It also carries a natural oil compatible with tobacco aroma, and it has a long track record of deterring the tobacco beetle, a pest that can wreck a collection built over decades.
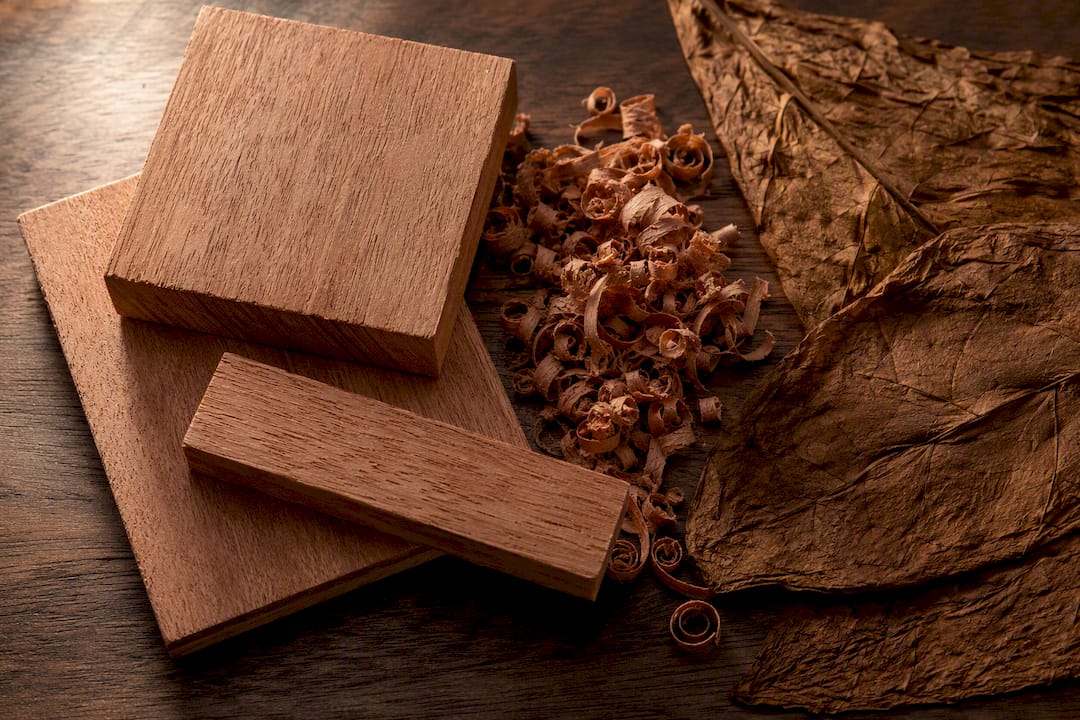
Builder-authored construction standards call for solid, kiln-dried Spanish cedar at a minimum thickness of roughly a quarter inch for wall lining and shelving, never a thin veneer glued to plywood. Veneer looks the part on day one, then delaminates the first time humidity climbs. Film finishes, polyurethane, and lacquer are equally off the table. They seal the wood’s pores and block the exact hygroscopic exchange you’re paying for.
Where budget or wall geometry makes full cedar lining impractical, such as a ceiling cavity or a mechanical closet wall, plywood or MDF substrates can work as a backing layer. But they need a cedar veneer facing at minimum on any surface the cigars will actually see or sit near, and they should never touch the vapor barrier directly.
- Specify solid, kiln-dried Spanish cedar boards, not composite panels, for walls and shelving.
- Avoid any polyurethane, lacquer, or shellac topcoat on cedar surfaces.
- Reserve substitute panels for non-visible backing only, always faced in cedar where cigars contact them.
- Confirm the lumber has acclimated on-site before final fastening.
Pro Tip: Ask your supplier for the cedar’s moisture content reading before delivery. Anything above 12 percent needs extra acclimation time before it goes on the wall.
Which Insulation and Vapor Barrier Keep Humidity Stable?
Rigid closed-cell foam, not fiberglass batt, is the material that keeps a walk-in humidor’s relative humidity from drifting when the seasons change. Foam holds its R-value in damp conditions, where batt insulation compresses and loses performance the moment moisture reaches it. For basement builds or any wall backed by concrete or masonry, boards like Owens Corning FOAMULAR 250 XPS give you a genuine thermal break against a cold foundation wall, and they resist the moisture wicking that ruins standard insulation over time.
The vapor barrier does the heavier lifting, though. Basement and below-grade walk-ins face constant moisture pressure from soil, and a standard 6-mil poly sheet won’t hold up. Stego Wrap 15-mil is the heavy-duty standard here, installed on the warm side of the insulation with seams overlapped a full 6 inches and sealed with specialized tape rather than duct tape or caulk.
- Overlap every seam by at least 6 inches and tape with a purpose-built vapor barrier tape.
- Seal every penetration, outlet box, and corner before insulation goes up.
- Cover the assembly with an approved thermal barrier layer to satisfy fire code over foam.
- Use foam-compatible adhesives only; solvent-based glues degrade rigid foam boards.
A cigar room is a small building envelope, and engineering it as one rather than as “a box with a humidifier” is the single biggest predictor of whether the room stays dry inside its walls or grows mold behind them. The most common failure isn’t bad material choice. It’s a vapor barrier with a gap that nobody checked before the drywall went up. Our insulation guide for cabinets walks through smaller-scale versions of this same logic.
What Door and Seal Setup Actually Holds Humidity?
Skip the interior hollow-core door. It has no insulation value and no real seal, and it will leak the humidifier’s output straight into your hallway. An insulated exterior-grade door, ideally a steel prehung unit built for exterior use, gives you both a thermal break and a frame rigid enough to hold a proper seal.
Weatherstripping matters as much as the door itself. Silicone D-profile gasketing around the full perimeter, paired with an adjustable threshold at the bottom, closes the gaps a standard door sweep misses. For extra insurance, layer a magnetic or compression seal on top of the primary gasket, which measurably cuts how often the humidifier has to run.
- Use an insulated exterior-grade or steel prehung door, never a standard interior slab.
- Install silicone D-profile weatherstripping around the full frame.
- Fit an adjustable threshold, not a fixed sweep, to compensate for seasonal shifting.
- Finish exposed wood on the door assembly with a moisture-tolerant paint or sealant.
- Shim and check the fit with a flashlight test for light leaks before finishing trim.
Which Flooring and Lighting Materials Belong in a Walk-In Humidor?
Ceramic or porcelain tile is the flooring material that holds up under sustained high humidity without warping, cupping, or trapping moisture the way solid hardwood does. If solid wood flooring is important to the room’s aesthetic, install it over a raised, ventilated subfloor rather than directly on a slab, and accept that it needs more monitoring than tile ever will.
Lighting should generate as little heat as possible near the cigars. Recessed LED or compact fluorescent fixtures do the job without the heat load incandescent bulbs throw off, and every fixture in a humid enclosure needs a damp-rated or wet-rated housing.
- Choose ceramic or porcelain tile, or sealed concrete, over solid hardwood.
- If wood flooring is non-negotiable, raise it on a ventilated subfloor.
- Use recessed LED or compact fluorescent fixtures rated for damp locations.
- Position light fixtures away from direct exposure over open shelving.
Pro Tip: Run lighting on a separate switch or timer from the humidification system. You want light only when you’re browsing the collection, not heating the room around the clock.
How Do You Size and Place a Humidifier for a Walk-In Room?
Two humidification technologies dominate room-scale builds: isothermal steam units and adiabatic systems, which include ultrasonic and atomizing foggers. Steam units deliver more consistent output and tolerate tap water better, though they draw more energy. Adiabatic systems run cooler and quieter but demand cleaner water to avoid mineral dust settling on nearby surfaces, including your cigars.
Sizing follows room volume, not square footage. Larger rooms and rooms with frequent door traffic need proportionally more capacity, and design guides for commercial-scale rooms recommend stepping up to commercial ultrasonic or steam systems with auto water-feed for larger room volumes. Undersizing the humidifier is a common mistake collectors make, and it shows up as slow recovery every time the door opens.
- Calculate room volume in cubic feet, then add a leakage allowance for door frequency and any wall penetrations.
- Match that adjusted figure to a unit rated for at least that capacity, not the bare minimum.
- Position the humidifier and any distribution fans so airflow never blows directly on stored cigars.
- Use baffles or diffusers to spread output evenly rather than concentrating it near one wall.
- Feed the system with distilled or RO/DI water only, never tap water.
- Clean and descale the reservoir on a fixed schedule to prevent mineral buildup and mold.
How Should You Lay Out Cedar Shelving Inside a Walk-In Humidor?
Slatted Spanish cedar shelving, spaced to let air move both across and between shelves, outperforms solid shelf panels for one simple reason: it eliminates the dead-air pockets where humidity and temperature drift from the rest of the room. Standard depths run 12 to 16 inches, with a slight forward tilt on display shelving so labels stay visible without cigars rolling off.
Where shelving runs along an exterior or below-grade wall, hold it back from the wall surface rather than mounting it flush. That standoff gap, generally 1 to 2 inches, prevents the wall’s cooler surface temperature from creating a condensation zone right where your boxes sit, a risk worth checking with a simple wall-temperature test before you commit to flush paneling in cold climates.
- Space slats to allow visible airflow gaps, not tight-fit solid boards.
- Hold shelving 1 to 2 inches off any exterior wall surface.
- Keep aisle widths generous enough for two people to pass comfortably.
- Budget roughly 1 to 1.5 cubic feet of shelf space per 25 to 30 boxed cigars for rough capacity planning.
What Are the Biggest Build Mistakes and How Do You Season Cedar Correctly?
The failures that sink a walk-in humidor project are rarely exotic. They’re an incomplete vapor barrier, a thermal bridge left unaddressed at a stud or corner, an undersized humidifier, or solvent-based adhesive that quietly degrades rigid foam over months. Any one of these can undo every dollar spent on cedar.
Load calculation deserves its own line item and not a guess. Estimate humidifier capacity from room volume plus a realistic leakage allowance, and if the room ties into central HVAC, coordinate with an HVAC professional so cooling cycles don’t trigger condensation swings when the system kicks on and off.
- Let cedar boards acclimate on-site, unstacked or thin-stacked, for at least several days before fastening.
- Vent the space normally during this period rather than sealing it up early.
- Fasten boards only once moisture content stabilizes, avoiding a rush to finish.
- Ramp humidity up gradually after installation rather than flipping the humidifier straight to target RH.
- Hold a pre-occupancy inspection checking every seam, seal, and door gap before loading a single cigar.
Installing bone-dry cedar and switching on humidification immediately causes the boards to swell and pull away from fasteners within weeks. Our guide to cedar sheet selection covers sourcing and acclimation timing in more depth.
Pro Tip: Photograph every seam and seal before drywall or trim goes up. If a problem surfaces six months later, you’ll want to know exactly what’s behind that wall.
What Does a Walk-In Humidor Build Actually Cost?
Cedar material, vapor-barrier products, insulation, the humidification system, and skilled labor drive the bulk of a walk-in humidor budget, roughly in that order of variability. A modest closet conversion with basic cedar lining and a mid-range humidifier sits at the low end. A dedicated room with full commercial humidification, tile flooring, and finish carpentry runs considerably higher.
Timeline matters as much as budget. Framing, insulation, and vapor barrier work typically finish within one to two weeks for a standard room. Cedar acclimation and seasoning add another week or more before you can trust the space with real inventory, and skipping that step to save time is the trade-off that costs collectors the most in swollen boards and reinstalled shelving later.
- Prioritize the vapor barrier and insulation first; they’re the hardest to fix after drywall closes.
- Spend on a correctly sized humidifier before splurging on premium cedar grade.
- Save on shelving hardware and finish trim without touching the building envelope.
Does Material Choice Affect Long-Term Mold Risk?
Material selection is your first line of defense against mold, and it starts before the humidifier ever turns on. Spanish cedar itself carries natural resistance to fungal growth, but that resistance only holds if the moisture load around it stays in check. Drywall behind a vapor barrier that’s been compromised by an unsealed penetration becomes a hidden mold reservoir, often discovered only when a musty smell finally reaches the room’s interior.
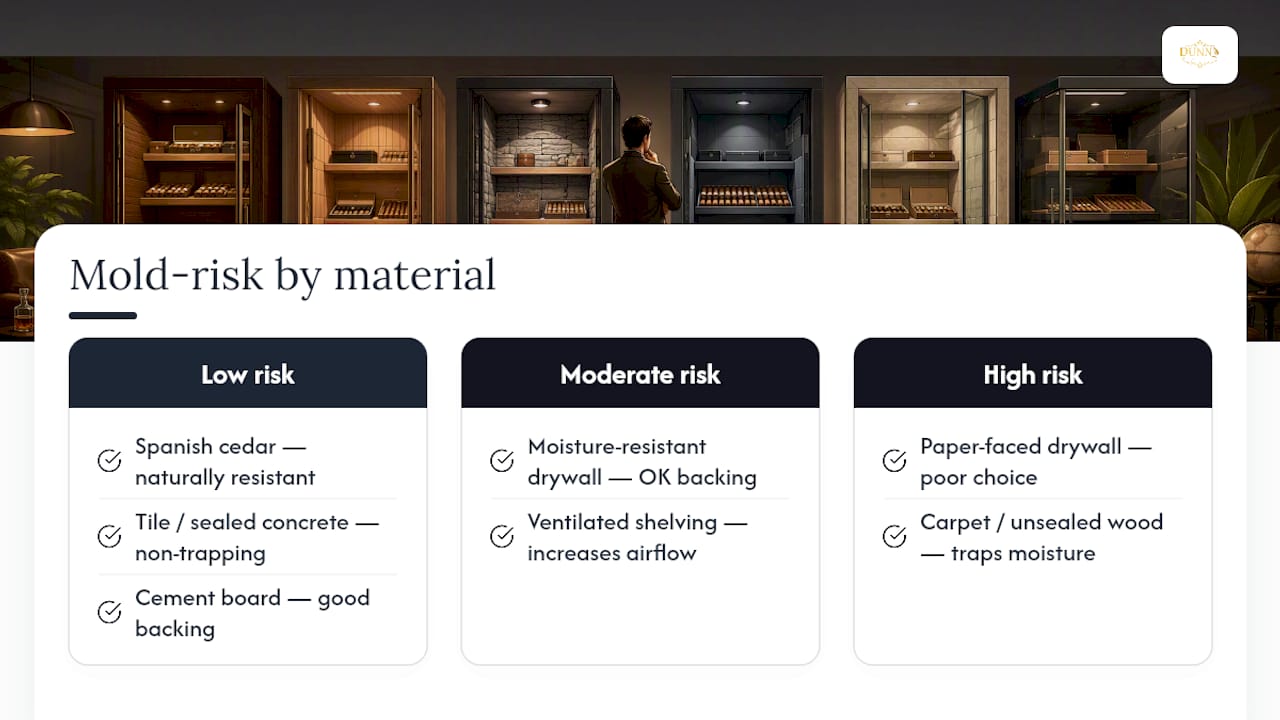
Cement board and moisture-resistant drywall are reasonable choices for backing layers behind cedar facing, particularly near any point where plumbing or electrical runs penetrate the wall. Standard paper-faced drywall, by contrast, is a poor choice for any surface with even indirect exposure to the humidor’s target relative humidity range, generally held between 68 and 70 percent.
Flooring plays into this equation too. Tile and sealed concrete don’t trap moisture the way carpet or unsealed wood subfloor can, which matters most in the inches closest to the slab where humidity tends to pool. Ventilated, standoff shelving described earlier serves double duty here: it keeps cigars off cold surfaces and keeps air moving across every material in the room, denying mold the stagnant, damp microclimate it needs to take hold. The materials that resist mold best are the ones that never let moisture sit still against a surface long enough to become a problem.
When Should a Collector Commission a Custom Build Instead of DIY?
Once a collection’s value, a room’s complexity, or its tie-in to existing HVAC exceeds what a weekend project can safely handle, professional design earns its cost. Specialists calculate the envelope, size the load, and stand behind the result with proper warranty coverage. Dunnluxuryselections offers exactly this through custom consultation and white-glove delivery.
Get a Walk-In Humidor Built on the Right Materials
Every material decision covered here, cedar grade, vapor barrier continuity, humidifier sizing, exists to protect a collection that took years to build. Custom walk-in humidor projects apply the same materials-first discipline, matching cedar lining, insulation, and climate integration to the room’s actual envelope rather than a generic template.

Beyond full custom builds, the catalog includes finished pieces built on the same principles. The Chateau (Burl) showcases premium burl-finished cedar construction for collectors who want walk-in quality craftsmanship in a statement piece. The Chardonnay offers a desktop-scale option with the same attention to cedar lining and seal quality. The Chalet Glasstop (Cherry) demonstrates how cherry wood and glass detailing pair with proper humidity buffering in a display format.
If you’re planning a walk-in project, consider scheduling a consultation to review your wall type, room volume, and material specifications before you break ground.
Sources
For deeper reference, see professional humidor construction standards on cedar specifications, vapor barrier and insulation supply guidance for basement builds, and Dunnluxuryselections’s care guides for ongoing maintenance.
- Engineering the Perfect Smoke: A Design Guide to Humidity Control in Cigar Rooms | UltraPure Systems
- Building a basement cigar humidor supplies (JourneymanHQ)
- Professional Humidor Construction Standards | Majesty Woodworks
- How to build a walk-in humidor (HomeSteady)
FAQ
How can I build a DIY walk-in humidor?
Start with the building envelope: frame the space, install closed-cell rigid foam insulation, lay a continuous vapor barrier with taped seams, then line the interior with solid Spanish cedar and add a sized humidifier before loading any cigars.
What is the 135 rule for cigars?
There’s no single, universally recognized temperature and humidity pairing near 70°F and 70 percent relative humidity in professional humidor construction standards; if you’ve seen it referenced, it likely refers loosely to a temperature and humidity pairing near 70°F and 70 percent relative humidity, which is the general target range most builders use.
How much does it cost to make a walk-in humidor?
Costs vary widely based on room size, cedar grade, and humidification system, with cedar lining, vapor-barrier materials, insulation, and skilled labor as the largest line items; a simple closet conversion costs far less than a dedicated room with commercial-grade climate control.
Can you use just distilled water in a humidor?
Distilled or RO/DI water is strongly recommended for any humidification system because tap water’s minerals build up inside reservoirs and can create dust that settles on cigars and shelving over time.
Why is Spanish cedar used instead of other wood species?
Spanish cedar buffers humidity through its natural hygroscopic properties, deters the tobacco beetle, and carries an aroma profile that complements cigars, which is why professional construction standards require it over composite or veneer alternatives.
How do I know if my humidifier is properly sized?
Calculate your room’s cubic footage, add an allowance for door traffic and any wall penetrations, then match that figure to a unit rated at or above that capacity rather than the bare minimum listed for the room’s square footage.
What’s the biggest mistake collectors make when building a walk-in humidor?
Installing dry cedar and immediately running the humidifier at full target humidity, which causes the boards to swell and pull away from fasteners within weeks; proper acclimation before fastening prevents this.
Recommended
You May Also Enjoy
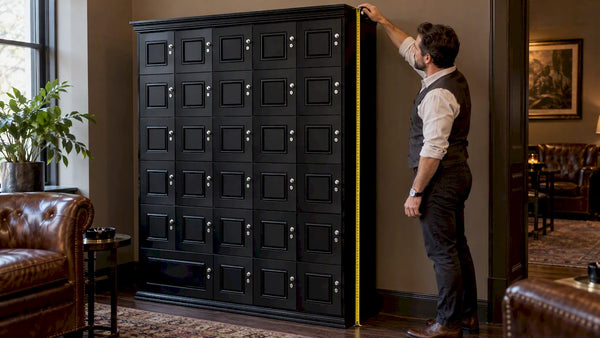
Cigar Locker Dimensions: Sizing Guide for Collectors and Lounges
Cigar locker dimensions explained: compartment sizes, cabinet footprints, capacity math and clearances, so you size a locker bank...
Read Article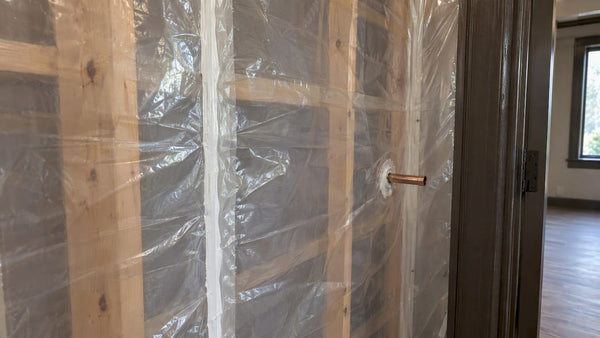
Sealing a Walk-In Humidor: Envelope, Door and Penetrations
How to seal a walk-in humidor properly: vapor barrier placement, door gasket, penetrations and the controlled airflow a...
Read Article
Retail Humidor ROI: How to Measure What a Display Earns
What does a retail or lounge humidor really return? A practical framework for cigar shops, lounges and clubs:...
Read Article